Scissor practice can build confidence and important hand skills—but it works best when children have the right foundations first. Explore the developmental steps and practical classroom strategies below, and consider How Preschoolers Develop  Buy Now $32.00 to deepen your understanding of milestones and developmentally appropriate instruction.
Why do pre-scissor skills matter?
Cutting looks like a single action, but it combines several abilities: hand strength, finger control, visual attention, stable posture, and coordination between both hands. The cutting hand opens and closes the scissors while the other hand holds and gradually turns the paper. This bilateral coordination also appears in everyday routines such as opening containers, dressing, and using classroom tools.
These foundations are relevant to preescritura because children benefit from varied opportunities to strengthen hands and coordinate what they see with what they do before being expected to manage extended pencil or cutting tasks. Scissor practice is not a test of school readiness, nor does one cutting sample reveal a child’s overall development. It is one meaningful activity among many that supports participation, creativity, and growing independence.
For providers, observing the process can be more useful than judging the finished craft. Notice whether a child can sit comfortably, use each hand for a different job, and persist briefly without excessive effort. Build from what the child can already do, and celebrate small steps toward control. That approach makes cutting a manageable learning experience rather than a source of pressure for children or staff.
What skills should children develop before using scissors?
Before introducing paper cutting, offer playful activities that strengthen the movements and coordination involved. Children do not need to master a rigid checklist before exploring scissors, but foundational experiences can make early attempts easier and more enjoyable.
- Build hand strength by squeezing and rolling #playdough, sponge play, or soft balls.
- Develop finger control with large clothespins, tongs, or child-safe tweezers to transfer objects.
- Encourage two-hand cooperation through tearing paper, threading large beads, building, and opening containers.
- Support visual-motor coordination with drawing, stickers, simple puzzles, and placing objects along a path.
- Check the environment: stable seating, supported feet, and a table at a comfortable height help children use their hands with greater control.
Begin with large, easy-to-manage materials and brief invitations to play. For example, children can tear paper into pieces for a collage, squeeze playdough into “snakes,” or use tongs to move pompoms into a bowl. These activities develop related skills without requiring a child to cut before they are comfortable. Adapt the size and resistance of materials to each child’s abilities, and keep close supervision whenever tools or small objects are present.
When is a child ready to begin learning scissor use?
There is no single birthday that makes every child ready. Many children begin exploring scissors or practicing snips during the toddler-to-preschool years, while more controlled line and shape cutting develops later. Age ranges in developmental guides are broad reference points, not deadlines; children’s experience, opportunities, and individual development all matter.
Look for functional signs of readiness rather than relying on age alone. A child may be ready for supported practice when they can sit with reasonable stability, show interest in the tool, attend to a simple safety direction, and attempt to open and close the scissors. Early exploration may involve two hands and an inefficient grasp. With patient modeling and appropriately sized tools, control can develop gradually.
A practical progression commonly moves from holding scissors and practicing the open-close motion, to small snips, forward cuts across short strips, straight lines, curves, and simple shapes. Some children may spend longer at one stage, and that is acceptable. Avoid comparing classmates or insisting that every preschooler complete the same worksheet. For a closer look at age-appropriate development and individualized teaching, explore How Preschoolers Develop Buy Now $32.00. State requirements vary - check your state licensing agency for supervision and classroom safety rules.
How can educators teach cutting step by step?
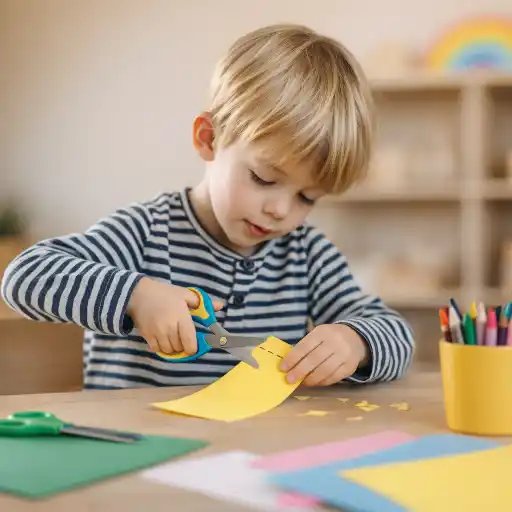
Make each step clear, short, and achievable. Demonstrate slowly and use one simple cue at a time, such as “thumb up” or “turn the paper.” Arrange children so they can see your hands; if you are modeling for a left-handed child, sitting opposite them may make the demonstration easier to mirror.
- Introduce child-sized, age-appropriate safety scissors and practice carrying, passing, and storing them safely.
- Model the grasp: thumb in the smaller loop when appropriate, with the thumb pointing upward. Fit and comfort matter; use tools suited to the child’s hand and needs.
- Practice opening and closing the blades without paper, then try snipping playdough or a short, firm paper strip.
- Progress to short forward cuts and broad straight paths. Encourage the helper hand to hold the paper.
- When straight cutting becomes comfortable, try gentle curves, turning the paper, and then large simple shapes.
Keep the first materials manageable—narrow strips or sturdy paper are often easier to control than a large, floppy sheet. Offer left-handed scissors when a child consistently uses the left hand, and consider adapted or spring-assisted tools when opening and closing is difficult. Keep practice brief and positive; a few successful minutes are more useful than a prolonged task that ends in fatigue or distress.
How can you adapt activities and monitor progress?
Effective instruction adjusts the task rather than asking every child to perform it in the same way. A child who is not ready for paper cutting can still participate in the group’s creative project by tearing paper, placing collage pieces, squeezing dough, or choosing materials. For a beginner, use wide strips and a single snip; for a child with more control, offer bold straight paths, curves, or larger shapes.
Observe and document specific actions rather than recording a vague judgment such as “good at scissors.” Note whether the child opens and closes the tool, moves forward, stabilizes the paper with the helper hand, follows a short path, or turns the paper. Brief notes or dated work samples can help staff notice progress and plan an appropriate next step. They can also support constructive conversations with families.
Common pitfalls are starting with intricate shapes, using scissors that do not fit, giving long instructions, or treating a developmental range as a deadline. Reduce the challenge, model one action, and offer another route to participate. If difficulties persist despite reasonable practice—such as marked frustration, inability to manage the opening-and-closing motion, or notable difficulty coordinating both hands—share observations with the family and suggest they consult the child’s health care provider about whether an occupational therapy evaluation may be helpful. Educators observe and support; they do not diagnose.
Conclusion: What should providers remember about pre-scissor skills?
Children benefit when learning to cut begins with foundations, not pressure. Hand strength, finger control, stable posture, visual attention, and two-hand coordination can be encouraged through everyday play, then built into a gradual sequence from opening and closing to snips, lines, curves, and shapes. Readiness and timing differ, so use developmental ranges as guidance rather than deadlines.
For your classroom, choose well-fitting tools, model safe use, keep practice brief, and adapt materials to the child’s current abilities. Track observable steps, recognize effort, and collaborate with families when concerns continue. The central question—what comes before cutting, and when should children learn to use scissors?—is answered by following each child’s progress: build the foundations, introduce tools when the child is ready to explore them safely, and let skills grow through supportive practice. For deeper professional learning, review the ChildCareEd course on preschool development Buy Now $32.00.
- 45 Hour Child Growth and Development
- CDA Home Visitor Subject Area 3 Part 3 Birth to 5
- CDA Home Visitor Subject Area 2 Part 3 Birth to 5
- 45 Hour Preschool Methods and Materials
- Bienvenido! Welcoming All Families
- Pediatric RSV First Aid & CPR/AED
- 45 Hour School Age Methods and Materials
- Texas Director Credential
- Developing Skills Through Fall Crafts in Childcare
- How to boost fine motor skills: Holiday Edition
- CDA Certification en Español: Recursos y Consejos para Educadores Bilingües
- Recursos en Español sobre el Sueño Seguro del Bebé
- ¿Cómo pueden los equipos de cuidado infantil practicar habilidades rápidas de primeros auxilios en situaciones reales?
- Retraso del Habla en la Guardería: Cómo Pueden Ayudar los Proveedores
- Celebrando la amistad en el cuidado infantil durante el Día de los Mejores Amigos
- How can childcare providers support fine motor development with simple activities?
- How Can Cut, Sort, and Glue Activities Strengthen Early Learners’ Development?
- How Can Child Care Providers Strengthen Fine Motor Development Through Play and Daily Routines?
- What Should Child Care Providers Look For in Fine Motor Skills by Age?
- How Can Halloween Fine-Motor Activities Be Fun Without Being Scary?
- How Does Word Sorting Build Phonics and Vocabulary Skills?
- How Do Cut-and-Paste Activities Build Fine-Motor Control and Planning?
- How Do Wearable Crafts Support Fine-Motor Skills and Classroom Celebration?
- How Can Child Care Providers Teach Scissor Skills Safely and Developmentally?
- What Skills Come Before Cutting, and When Should Children Learn to Use Scissors?
- When Does a Preschool Worksheet Demand More Motor Control Than the Learning Goal Requires?
- How Can You Adapt a Cutting Activity Without Removing a Child’s Participation?
- How Can You Set Up Shared Art Tables for Left- and Right-Handed Children?
