Engage your #students in a calming, developmentally meaningful DIY project: sensory bottles. In this practical guide for early childhood educators, you will find a concise rationale, safe materials lists, a step-by-step recipe, ideas for theme-based variations, and classroom management and storage tips. Two short ChildCareEd courses that complement this activity are The Best Promotion is Play Buy Now $35.00 and Playful Spaces for Infants & Toddlers  Buy Now $24.00, both of which offer strategies to integrate sensory play into developmental planning. #students #classroom #sensory #play #creativity
What are sensory bottles and why use them in the classroom?
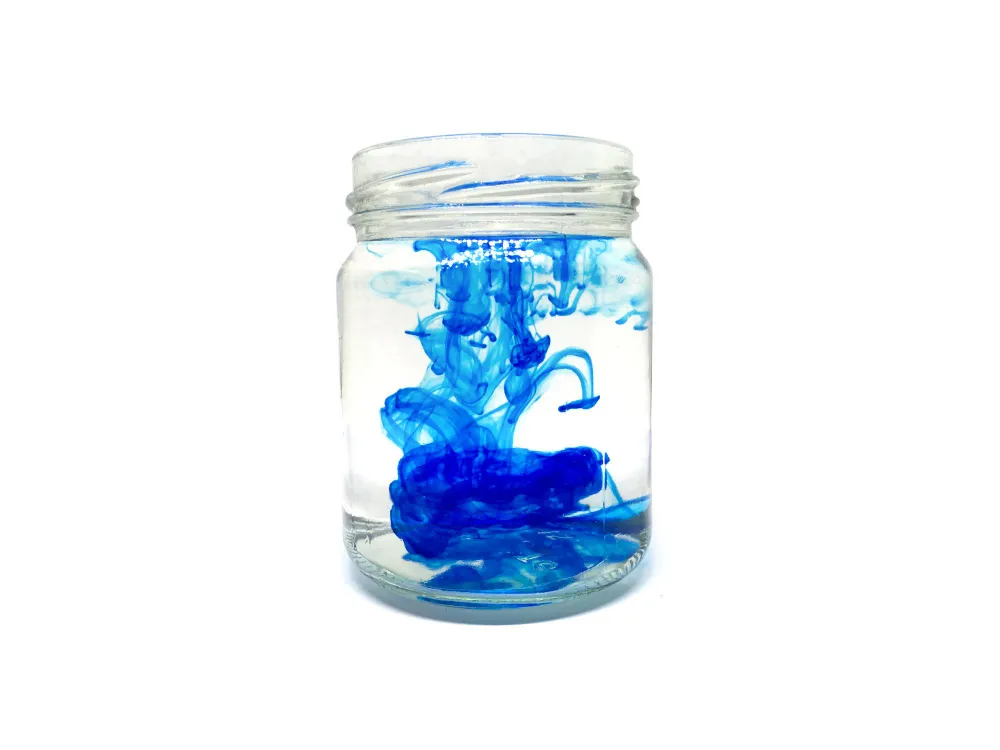
Sensory bottles (sometimes called calm-down bottles) are transparent containers filled with liquids and loose parts designed to provide visual and tactile stimulation. In group settings, they serve multiple pedagogical and therapeutic purposes: they support self-regulation, provide a predictable sensory input for children with sensory-seeking or sensory-avoidant profiles, scaffold language (through description and labeling), and offer an accessible fine-motor activity when children help assemble or manipulate sealed bottles under supervision. Use them as a brief calming tool during transitions or as part of an intentional sensory center aligned to developmental goals.
What materials are safe, appropriate, and adaptable for different ages?
Choose items with safety and developmental appropriateness in mind. For liquid-based bottles, common components include clear plastic bottles or jars, warm water, clear glue or dish soap (to slow settling), non-toxic food coloring or liquid watercolor, glitter, sequins, and small non-toxic loose parts that cannot detach through the neck of the bottle. For discovery or “I-Spy” style bottles, dry fillers such as rice or dried pasta may be used, but these are better reserved for older preschoolers who will not put items in their mouths.
Practical substitutions and cautions:
- Prefer clear plastic to glass when working with younger children in group settings to reduce the risk of breakage.
- Use clear glue or glycerin in small amounts to slow glitter movement; test ratios in advance.
- Avoid small parts for programs serving children under three unless bottles are professionally sealed and supervised at all times.
- Label bottles with program name and date in permanent marker and inspect regularly for leaks or wear.
How do you make a sensory bottle: a step-by-step recipe for classrooms?
Below is a reliable, classroom-friendly recipe that balances visual effect with durability. Maintain active supervision when children help and always seal lids securely (see the Safety section).
- Gather a clear plastic bottle (250–500 ml work well) and remove any labels using warm, soapy water and gentle abrasion (steel wool or a scrubbing pad).
- Measure approximately 1–2 ounces of clear school glue into the bottle (the more glue, the slower the movement).
- Add warm water to the bottle until it is about three-quarters full, leaving space to mix.
- Add a few drops of non-toxic food coloring or liquid watercolor for tint; mix gently.
- Stir in glitter, sequins, or beads. For educational versions, add small thematic items (buttons, alphabet beads) that are large enough to be contained safely, depending on the age group.
- Top off with warm water, leaving ~1/2 inch of headspace to allow mixing without bursting the seal.
- Seal the lid, then apply a bead of strong adhesive (hot glue or industrial super glue) to the inside rim and screw lid on tightly. Wipe away excess adhesive.
- Allow adhesive to cure fully before giving the bottle to children; then tape the lid with clear packing tape for an additional physical barrier.
If you prefer a slow cascade, substitute some water with a small volume of baby oil (test for acceptability with your program's policies) or add a few drops of glycerin. For 'I-Spy' discovery bottles, use dry fillers and consider transparent jars that can be monitored more easily.
How do sensory bottles support development and classroom goals?
Sensory bottles are versatile tools that support several domains of early development. Use them with explicit intent: pair a bottle with a teacher prompt to practice labeling (language), ask a child to observe and predict how long glitter takes to settle (cognitive reasoning), or place bottles at a calm-down station for children practicing emotion regulation strategies (social-emotional).
For children with sensory processing differences, bottles provide a predictable, controllable sensory input that can reduce anxiety and increase focus when used as part of a structured plan developed with families and, when appropriate, specialists. To deepen learning, integrate bottles into thematic units (e.g., ocean, weather) and align prompts to learning objectives from your curriculum or the course Theory of Learning Buy Now $24.00 or From Play to Planning Buy Now $55.00.
How should I manage safety, storage, and program policies?
Safety is paramount. Recommended practices include:
- Choose plastic bottles for rooms with infants and toddlers; keep glass for teacher demonstration only.
- Seal lids with adhesive and add packing tape; perform routine visual checks for leaks.
- Store bottles on shelving above reach for infants; label with the creation date and the staff member who sealed it.
- Document the activity in your lesson plans and as a learning center option. Confirm that sensory bottles meet your state licensing and program health & safety policies.
For supervision guidance related to sensory materials and active play, consider the ChildCareEd courses Active Supervision: A Strategy That Works Buy Now $35.00 and Healthy Starts: Safety, Nutrition, and Wellness in Child Care Buy Now $55.00, which offer protocols for safe implementation.
What are easy classroom-ready variations and extension activities?
Variation ideas:
- Calm-down bottle: heavy glitter, cool blue tint, used at transition stations.
- Discovery bottle: large alphabet beads and rice for a letter hunt activity (older preschoolers).
- Theme bottles: seasonal items (pumpkin seeds for autumn) paired with a small book and vocabulary prompts — see Pumpkin Spice and Sensory Delight.
Extension activities encourage language and observation: ask children to describe the movement, compare two bottles, or graph how long it takes for glitter to settle. Pair the bottles with a simple coloring-and-labeling activity using a bilingual coloring book that teaches colors and numbers so children practice color vocabulary and number recognition while documenting their observations.
Summary: What should educators take away from this guide?
Sensory bottles are low-cost, adaptable tools that—when designed and used intentionally—support self-regulation, fine motor skills, and language development. Implement them with age-appropriate materials, secure lids, and a plan for supervision and storage. Pair the activity with short, measurable learning objectives and consider linking the activity to professional development such as The Best Promotion is Play Buy Now $35.00 and Playful Spaces for Infants & Toddlers to integrate sensory play into your curriculum.
- Creating Safe & Healthy Child Care Environments
- 45 Hour Child Growth and Development
- CDA Preschool Credential with Portfolio Review
- 45 Hour Preschool Methods and Materials
- 45 Hour School Age Methods and Materials
- 24 Hour Texas Pre-Service
- 45-Hour Infant and Toddler Curriculum
- Texas Director Credential
- Rooted in History: Early Childhood
- How to Make Your Own Sensory Bottles!
- Teaching Kids About Memorial Day Through Crafts and Activities
- Creative National Ice Cream Day Ideas for the Classroom
- How Do Art Activities Support Cognitive Growth in North Dakota Preschoolers?
- How can North Dakota classrooms build toddler fine motor skills with simple activities?
- How Do Art Activities Support Cognitive Growth in North Dakota Preschoolers?
- Fall Sensory Activities for Toddlers and Preschoolers
- Diversión fresca de verano: actividades del Día Nacional del Helado para niños
- Canciones, juegos y preguntas de círculo para niños
- Cómo simplificar la capacitación para sus empleados de daycare
- How can Minnesota child care providers keep young children safe around Fourth of July fireworks?
- Easy Glitter Crafts for Toddlers and Preschoolers
- Summer Preschool Activities for Art, Science, and Sensory Play
- Summer Crafts and Activities for Preschool Classrooms
- Toddler Glitter Crafts: Fun, Safe, and Easy Ideas
- How can childcare providers support fine motor development with simple activities?
- Why Does Sensory Play Matter and How Can My Child Care Program Start?
- What sensory play ideas best support babies in child care?
- How can inexpensive sensory bins boost language, fine motor, social-emotional, and cognitive development?
- How can early childhood classrooms become more sensory-friendly?
