Cold-weather months bring opportunities for joyful outdoor learning, but they also require careful planning to protect young children from frostbite, hypothermia, wet clothing, slippery surfaces, and other seasonal hazards. This practical guide helps child care directors and providers create consistent, developmentally appropriate procedures for checking weather conditions, deciding when outdoor play is safe, dressing children in warm layers, limiting exposure, recognizing signs of cold stress, and responding during an emergency. To strengthen staff preparation, explore ChildCareEd’s self-paced online course Family Child Care: Building, Premises, and Outdoor Safety  Buy Now $16.00, which addresses weather-related hazards, outdoor safety checks, safe boundaries, and effective supervision. Programs can also use the free Child Care Weather Watch Buy Now $0.00 chart and Cold Weather Safety Buy Now $0.00 resource to guide decisions and communicate practical precautions with staff and families. Remember that state requirements vary, so always check with your state licensing agency.
When is it too cold to go outside?
- 🌬️ Wind chill: Use wind chill, not just thermometer readings. Wind increases heat loss and speeds frostbite risk; many centers treat wind chill below single digits (°F) as a trigger to shorten play and use about -15°F wind chill as a conservative cutoff to avoid outdoor time. See What Temperature Is Too Cold for Outdoor Play in Child Care? for practical examples and charts.
- 💧 Wetness and clothing: Wet clothes, rain, or slush accelerate heat loss. Bring children inside faster when clothing is damp and have spare dry items on hand (see ChildCareEd resources: Cold Weather Safety Buy Now $0.00).
- 👶 Child factors and activity level: Infants, toddlers, children with medical needs, or those who are sedentary lose heat faster—adjust limits and add warm-up breaks accordingly. The CDC emphasizes tailoring plans to developmental needs in Outdoor Play and Safety for Children in ECE.
Use a simple traffic-light routine: 🟢 Go (safe), 🟡 Adjust (shorten/monitor), 🔴 Indoors (unsafe). Post the rule where staff exit to the playground and train staff to check wind chill, surface conditions, and clothing before each outing. A visible posted chart, like the ChildCareEd weather chart, makes decisions fast and consistent.
How should programs write a cold-weather decision plan?
- 📋 Define roles and timing:
- 🔹 Assign one person to each outdoor block to do the weather check and post the daily decision.
- 🔹 Required checks: arrival, pre-outdoor block, and after weather changes.
- 📍 Set measurable cutoffs and actions (examples):
- 🟢 Wind-chill > 10°F = full outdoor time with monitoring.
- 🟡 Wind-chill 0–10°F = shortened outdoor time, extra warm-up breaks.
- 🔴 Wind-chill ≤ -15°F or heavy wetting/icy surfaces = stay inside.
- 🧰 Supplies and logistics:
- 🎒 Keep an emergency bag per classroom with dry socks, mittens, hats, blankets, and a thermometer.
- 📌 Post the decision chart by every exit; use the printable chart from ChildCareEd Buy Now $0.00.
- 👩🏫 Training and drills:
- 🔁 Practice warm-up breaks and rapid transitions indoors so staff can move children calmly during sudden weather changes.
- 📚 Include cold-weather modules in staff orientation; ChildCareEd courses like Health and Safety Orientation Buy Now $55.00 help standardize expectations.
Finally, document decisions and incidents. Keep temperature logs and a short incident checklist for any cold-related health events. And again: state requirements vary - check your state licensing agency when you finalize cutoffs and recording rules.
What clothing, supplies, and classroom routines protect infants and toddlers?
- 🧥 Layering system (use synthetics or wool; avoid cotton as a base when activity/wetness is likely):
- 1) Base layer: moisture-wicking long underwear.
- 2) Middle layer: fleece or insulated jacket for warmth.
- 3) Outer layer: wind- and water-resistant shell or snowsuit.
REI’s layering guidance is practical for decisions about fabrics and fit: How to Dress Your Kids for the Outdoors (REI).
- 🧤 Protect head, hands, and feet:
- • Warm hat that covers ears, mittens (warmer than gloves), thick socks, waterproof boots.
- • Spare mittens, hats, and socks in the classroom; rotate to families when needed.
- 🚗 Car seat safety and transport:
- • Do not buckle bulky coats under harnesses. Use thin layers and cover the child with a blanket over the fastened straps per safety guidance in the ChildCareEd infant post (Infant & Toddler Health Tips).
- ⏱️ Routines and supervision:
- • Schedule shorter outdoor blocks and frequent warm-up breaks (every 15–30 minutes in very cold or windy conditions).
- • Do frequent visual checks of extremities and body color for young children who cannot report numbness or pain.
Teaching routines to families reduces drop-off confusion: send clear clothing checklists and remind parents to label outerwear. Use ChildCareEd family handouts like Ready Wrigley Prepares for Winter Weather Buy Now $0.00 to support conversations with families.
How do we prevent and respond to frostbite and hypothermia?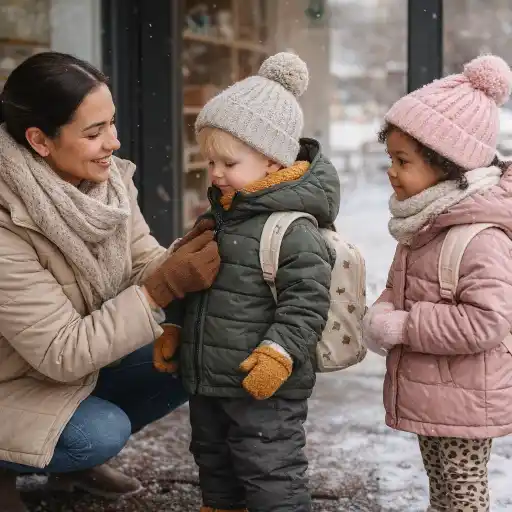
Prevention is the priority; rapid recognition and calm first aid come next. Use this concise guidance for staff training and emergency action plans.
- ⚠️ Know the signs:
- • Frostbite: numb, white or grayish-yellow, firm or waxy skin on fingers, toes, ears, nose. (CDC: Preventing Frostbite.)
- • Hypothermia: intense shivering, slurred speech, drowsiness, poor coordination — this is an emergency. (Red Cross: Hypothermia and Frostbite.)
- 🚨 Immediate actions:
- 1) Move the child indoors to a warm environment.
- 2) Remove wet clothing and dry the child.
- 3) Warm the child gradually (warm blankets, warm drinks if alert). For frostbite, warm affected areas in warm—not hot—water; never rub or use direct heat sources.
- 4) Call emergency services if signs of hypothermia are present or if frostbite is deep or spreading.
Detailed first-aid steps and cautions are available from KidsHealth and Akron Children’s guidance: Frostbite (KidsHealth) and Akron Children's: What to Do About Frostbite.
- 🧰 Preparedness and documentation:
- • Keep first-aid supplies and a warming space ready; train staff on pediatric hypothermia/frostbite response and when to call 911.
- • Document any cold-related incident with your incident report form and review the event to prevent recurrence; ChildCareEd offers sample forms and templates (License Exempt Provider Serious Injury Report Buy Now $0.00).
Ensure staff know not to rewarm frostbitten areas if refreezing is possible and to avoid applying direct heat. Regularly review local EMS and health guidance so emergency steps are aligned with your community services.
What common mistakes do programs make, and how can we help staff and families get it right?
Identifying frequent pitfalls helps you create targeted fixes. Below are common errors and straightforward remedies your program can implement immediately.
- ❌ No daily weather check — fix it:
- • Make weather checks part of morning arrival and pre-outdoor routine; post a visible chart from ChildCareEd Buy Now $0.00 by each exit.
- ❌ Relying only on indoor thermostat readings — fix it:
- • Use a classroom thermometer and log readings at arrival, before nap, and before outdoor time as best practice described in state guides like Daycare Temperature Regulations in Idaho.
- ❌ Insufficient spare clothing — fix it:
- • Keep labeled “extra gear” bins per classroom with hats, mittens, socks, and a change of pants for each age range.
- ❌ Infrequent staff training — fix it:
- • Provide short, practical refreshers each season; use ChildCareEd courses like A Watchful Eye: Supervision in Early Childhood Buy Now $16.00 to reinforce active supervision practices.
- • Provide short, practical refreshers each season; use ChildCareEd courses like A Watchful Eye: Supervision in Early Childhood
FAQ (quick):
- Q: Who cancels outdoor play? A: The program director sets policy; an assigned staff member makes daily calls using the posted chart.
- Q: How often should we check conditions? A: At least before each outdoor block and whenever conditions change.
- Q: What if a family can’t provide proper gear? A: Maintain an extra clothing supply and communicate needs compassionately to families; consider donation drives or community partners.
- Q: Are infants safe outdoors? A: Yes, briefly and with one extra layer than adults, protected from wind and wetness; follow infant-specific advice in the ChildCareEd infant post.
Why this matters: consistent routines reduce risk, protect staff decisions, and maintain children’s access to the developmental benefits of outdoor play even in cold months. Clear systems free staff to supervise and teach, rather than guess. For ready-to-use classroom resources, see ChildCareEd’s free PDFs and lesson ideas in Engaging Indoor Activities for Inclement Weather when weather forces indoor replacements.
Summary
Cold-weather safety is a program-level task that blends measurable weather cues with child-focused judgment. Use wind chill and wetness as primary cues, post a short decision chart, require daily checks, and keep spare gear and warm-up routines ready. Train staff, communicate with families, and document incidents. Practical next steps:
- 📌 Post a weather decision chart by exits (use the ChildCareEd printable chart).
- 🧰 Create classroom extra-gear kits and a quick-evacuation warm-up drill.
- 👩🏫 Run a 10-minute seasonal training to review signs of frostbite/hypothermia and when to call 911. Refer to CDC and Red Cross guidance for first aid details.
With clear policies, reliable tools, and a strengths-based approach to coaching families, your program can preserve healthy outdoor learning while protecting every child. And remember: state requirements vary - check your state licensing agency.
Infants and toddlers have higher surface-to-volume ratios and limited ability to tell adults they are cold. Use layers, protect extremities, and structure routines that reduce exposure risk.Decisions about outdoor play require blending measurable thresholds with program judgment. Key factors to check each time:A written plan reduces guesswork, aligns staff and families, and stands up during inspections. Build these elements into a short, accessible policy:
- 45 Hour Preschool Methods and Materials
- 1,2,3, Eyes on Me: Classroom Safety
- CDA Bridge Bundle: Family Child Care without Portfolio Review
- CDA Bridge Bundle: Infant/Toddler without Portfolio Review
- CDA Bridge Bundle: Preschool without Portfolio Review
- Texas Director Credential
- Safeguarding Young Lives: A Comprehensive Guide to Child Care Safety
- Family Child Care: Building, Premises, and Outdoor Safety
- Daycare Weather Chart to Keep Your Classroom Safe and Fun
- Illinois Weather & Outdoor Time at Daycare
- Texas Weather & Outdoor Time at Daycare
- Recursos en Español sobre el Sueño Seguro del Bebé
- Weather Safety in Child Care: Cold Weather, Summer Heat, and Outdoor Play
- How Can Child Care Programs Keep Children Safe in Different Weather?
- Child Care Weather Watch Guidelines for Outdoor Play
- Safe Temperature Regulations in Daycare: North Carolina Rules for Child Care Providers
- Safe Temperature Regulations in Daycare: Virginia Rules for Child Care Providers
- Safe Temperature Regulations in Daycare: Texas Rules for Child Care Providers
- Safe Temperature Regulations in Daycare: Nevada Rules for Child Care Providers
- Canciones, juegos y preguntas de círculo para niños
- How can New York child care programs keep young children cool and hydrated during a heat wave?
- What are Oklahoma's safe temperature rules for daycares and how do we follow them?
- What Are Pennsylvania's Rules for Safe Daycare Temperatures and How Do We Follow Them?
- What Are Florida's Safe Temperature Rules for Daycare Providers?
- Daycare Temperature Regulations in Alaska: How Cold Is Too Cold?
- Daycare Temperature Regulations in Utah: How Hot or Cold Is Too Much?
- How Can Child Care Programs Keep Young Children Safe in Cold Weather?
- How can child care programs prevent seasonal safety hazards like heat, cold, allergies, holiday risks, and outdoor play dangers?
