Shared toys can quickly carry saliva, dirt, and germs from one child to another, but a consistent process can make toy hygiene manageable. For a broader foundation in illness prevention, explore Prevention and Control of Infectious Diseases  Buy Now $16.00; this two-hour course can strengthen staff knowledge while supporting relevant professional training needs. You may also benefit from Handling and Storage of Hazardous Materials Buy Now $10.00, which focuses on safer chemical handling and biocontaminant disposal.
Why does proper toy sanitation matter in child care?
Toys are touched, shared, dropped, and frequently mouthed. In infant and toddler classrooms especially, a single item can move rapidly through many hands and mouths. Effective hygiene helps reduce opportunities for respiratory and gastrointestinal germs to spread while preserving children’s need for active, social play.
The goal is not to create a sterile classroom. Rather, providers need a reliable system that identifies which items require cleaning, sanitizing, or disinfecting and assigns responsibility for each step. The CDC explains that cleaning removes dirt and many germs with soap, water, and scrubbing; sanitizing reduces germs to safer levels; and disinfecting uses stronger products after cleaning to destroy remaining germs.
Strong routines also support staff confidence. When every educator knows where to place a mouthed toy, which products are approved, and how long a surface must remain wet, sanitation becomes part of the classroom rhythm instead of an improvised task.
- Prioritize toys that are mouthed, shared, or heavily handled.
- Remove visibly damaged items that cannot be cleaned thoroughly.
- Document responsibilities so sanitation does not become “everyone’s job” and therefore no one’s job.
What is the difference between cleaning, sanitizing, and disinfecting?
These terms describe different levels of germ control and should not be used interchangeably.
- Cleaning: Use soap or detergent, water, and friction to remove visible soil, saliva, food, and many germs.
- Sanitizing: Apply an appropriate sanitizer to a clean surface to reduce germs to a level considered safe by public health standards. This is generally appropriate for toys and objects that may enter a child’s mouth.
- Disinfecting: After cleaning, use an EPA-registered disinfectant or properly prepared solution when illness, body-fluid contamination, diapering, toileting, or another higher-risk situation requires stronger germ control.
The sequence matters: clean first, then sanitize or disinfect when indicated. Soil can interfere with a sanitizer or disinfectant, making the chemical less effective. Head Start guidance similarly emphasizes applying antimicrobial products only to clean surfaces and following the manufacturer’s directions for dilution, contact time, rinsing, and use sites.
For everyday toy care, do not automatically use the strongest chemical available. Select the least hazardous effective method that fits the toy, the situation, and your program’s written policy.
How should staff sanitize hard, washable toys step by step?
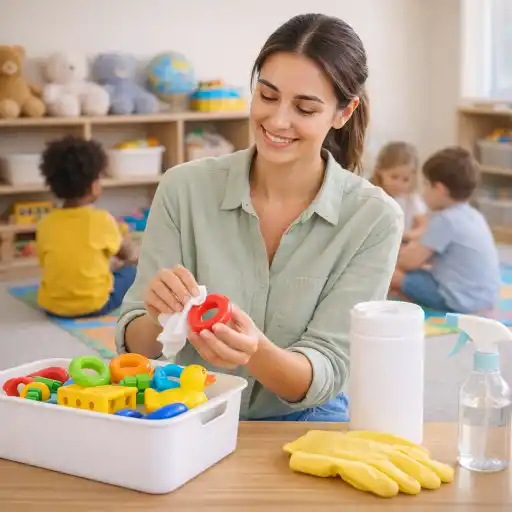
Hard, nonporous toys such as solid plastic blocks, vehicles, and play dishes are usually the most straightforward to process. Begin by removing the toys from circulation and placing them in a clearly labeled dirty-toy container.
- Inspect and sort: Separate electronic, wooden, fabric, cracked, and porous items from washable plastic or rubber toys.
- Clean: Scrub with soap or detergent and water. Use a small brush for grooves and textured areas.
- Rinse: Remove soap and loosened debris with clean water.
- Sanitize: Apply an EPA-registered product labeled for the surface and intended use, or use another method permitted by your regulations and the product manufacturer.
- Respect contact time: Keep the surface visibly wet for the time listed on the label. Reapply if it dries too soon.
- Dry: Place items on a clean rack or surface and allow them to air-dry completely before returning them to children.
Some centers use a dishwasher for dishwasher-safe, non-electronic items. Check the toy manufacturer’s directions before using heat or water pressure. Never submerge battery-operated or electronic toys. Wipe those items according to the manufacturer’s instructions, taking care not to force liquid into openings.
For toys that touch food or children’s mouths, verify whether the product label requires rinsing after sanitizing. Do not assume that every chemical product can air-dry without rinsing.
How should centers handle plush, wooden, and electronic toys?
Material determines the safest method. A process that works for hard plastic may damage wood, trap moisture in fabric, or destroy electronics.
- Fabric and plush toys: Follow the care label. Launder machine-washable items with detergent and dry them completely. Consider assigning a plush item to one child at a time, especially in infant and toddler rooms. Remove mouthed or visibly soiled fabric toys immediately for laundering.
- Wooden toys: Avoid soaking unless the manufacturer specifically permits it. Wipe with a compatible damp cloth and mild detergent, remove residue according to product directions, and dry promptly. Inspect for cracks, peeling finishes, or rough edges.
- Electronic toys: Remove batteries when appropriate, follow manufacturer guidance, and use a product approved for the device’s surface. Apply liquid to a cloth rather than directly to openings unless the label states otherwise.
- Bath and squeeze toys: Inspect for trapped water, mold, or inaccessible cavities. Discard items that cannot be opened or cleaned adequately.
When a toy cannot be effectively cleaned and sanitized, taking it out of circulation is a health and safety decision, not a failure. Children benefit from materials that are durable, washable, and developmentally appropriate.
Use a clean drying area separate from dirty-toy collection. Moisture left in bins or crevices can support mold growth and recontaminate otherwise clean materials.
How often should toys be cleaned and sanitized?
Frequency should reflect age, use, material, and contamination risk. A universal calendar is less useful than a decision process built into classroom routines.
- Remove and clean a toy immediately if it is mouthed, visibly soiled, coughed or sneezed on, or exposed to body fluids.
- Clean and sanitize toys used by infants and toddlers regularly, with increased attention to mouthed and shared items.
- Clean high-touch communal toys at the end of the day or according to your written schedule.
- Increase cleaning and use of disinfection procedures when illness is present or after vomiting, diarrhea, blood, or other body-fluid contamination.
- Clean toys before moving them between classrooms or groups.
A labeled “to be cleaned” bin is one of the simplest systems a center can implement. Staff can immediately remove a mouthed toy without interrupting supervision. The toy then follows the documented cleaning workflow before returning to play.
Directors can support consistency with a rotating toy schedule. Divide materials into manageable sets, keep one set available, and process the used set during closing duties. Rotation reduces clutter and gives staff a realistic workload without limiting children’s access to rich learning materials.
Use a checklist that identifies the room, date, staff initials, method used, and any items discarded or sent for repair. Records do not replace good practice, but they help leaders identify missed routines and prepare for licensing conversations. State requirements vary - check your state licensing agency.
What common mistakes should child care programs avoid?
Busy classrooms make shortcuts tempting. The following errors are common because they seem efficient but can reduce effectiveness or create new hazards.
- Disinfecting before cleaning: Soil can block chemical action. Scrub and rinse first.
- Ignoring contact time: Wiping a product away immediately may not allow it to work. Keep the surface wet for the label’s required time.
- Using one product for every material: Check compatibility with wood, fabric, rubber, plastic, and electronics.
- Returning damp toys to storage: Dry toys completely to reduce mold and recontamination.
- Using unapproved homemade mixtures: Vinegar and other household ingredients should not be treated as substitutes for EPA-registered sanitizers or disinfectants when those products are required.
- Leaving chemicals unattended: Even a brief interruption can create a serious exposure risk.
- Cleaning during active supervision: Assign coverage so a sanitation task never leaves children unobserved.
Conduct brief coaching demonstrations rather than assuming staff understand the procedure. Ask educators to explain where mouthed toys go, which products they use, how contact time is measured, and when a toy should be discarded. This approach reveals gaps without blaming staff for working in demanding conditions.
Conclusion: What is the safest toy-sanitation routine?
Proper toy sanitation begins with a clear decision: clean, sanitize, or disinfect according to the toy and the risk. Clean with soap, water, and scrubbing; sanitize clean toys that contact mouths or food; and disinfect after illness, body-fluid contamination, or other situations identified by policy and regulation.
The most dependable program combines material-specific methods, a mouthed-toy bin, complete drying, accurate product-label use, locked chemical storage, staff training, and simple documentation. Review the routine regularly with educators and adjust it when children’s ages, materials, products, or local requirements change.
For continued professional learning, consider How To Keep A Healthy Class: Six Tips for Germ Control Buy Now $35.00, which addresses communicable disease prevention and hygiene-focused policies, or Health and Safety Orientation Buy Now $55.00 for broader health and safety topics. These courses can extend the practical strategies described here; verify with your state licensing agency whether a specific course meets your training requirements.
- Requisitos de Cuidado Infantil en Nueva Jersey para Centros y Proveedores de Cuidado Infantil Familiar
- Proporciones de Cuidado Infantil y Tamaños de Grupo por Edad en Maryland (Guía Rápida para Centros y Hogares)
- Proporciones de Cuidado Infantil y Tamaños de Grupo por Edad en Nueva Jersey (Guía Rápida para Centros y Hogares)
- Proporciones de Cuidado Infantil y Tamaños de Grupo por Edad en Virginia (Guía Rápida para Centros y Hogares)
- Lista para Abrir una Guardería en Casa en Carolina del Norte: Cómo Empezar
- Cómo Trabajar en el Cuidado Infantil en Wisconsin: Requisitos y Pasos
- How can childcare centers use simple health and safety best practices every day?
- How Can We Create a Healthy Childcare Environment?
- How can food safety training protect children in my child care program?
- Cómo simplificar la capacitación para sus empleados de daycare
- How can child care programs control infections and keep kids healthy?
- How can child care programs prevent infections and keep kids healthy?
- How do I choose age-appropriate toys and materials for my Minnesota program?
- How can child care programs use safe diapering and toileting procedures to protect children and stay compliant?
- How should childcare programs clean, sanitize, and disinfect spaces to keep children and staff safe?
- How can group child care programs effectively prevent the spread of illness?
- How can I manage childcare supplies and classroom materials efficiently and safely?
- How can the last 15 minutes of the day keep children, families, and staff safer and calmer?
- How Can Child Care Centers Properly Sanitize Toys?
- How Often Should Daycare Toys and Classroom Materials Be Cleaned and Sanitized?
