A child’s “Why did my shadow get bigger?” can become a memorable science investigation with a flashlight, a familiar object, and time to experiment. For a stronger foundation in planning hands-on inquiry, explore Basic Science in Early Childhood Buy Now $25.00, a two-hour training focused on meaningful science experiences and children’s reasoning. Read on for a practical way to help preschoolers discover how light, distance, and position shape the shadows they see.
Why does a shadow change size?
A shadow forms when an object blocks light from reaching a surface. In a simple classroom arrangement, light source, object, and screen line up: the object sits between a flashlight and a wall or sheet, and the shadow appears on the other side. Moving one part of this arrangement can change the shadow’s size, shape, or position.
For a clear starting point, hold the flashlight steady and move an opaque object closer to the light. The shadow typically grows larger; move the object toward the screen, farther from the light, and it generally becomes smaller. The relationship is easiest to notice when the light and screen remain still. If several things move at once, children may see a change without knowing what caused it.
Use everyday words first—near, far, bigger, smaller, outline—and introduce terms such as light source and opaque as they become useful. The Science in Pre-K overview of light and shadows describes a shadow as light blocked by an object and notes that distance from the light influences shadow size.
This question matters because shadows make an invisible process visible. Children can see the effect, change a position, and compare outcomes, building early #science reasoning through hands-on investigation rather than memorizing a definition.
How can you set up a simple flashlight investigation?
Choose a spot where children can see the projected image clearly. You will need a battery-powered flashlight, a pale wall or sheet, and several familiar, sturdy objects such as a block, toy animal, cup, or cardboard shape. Begin with one light and one object; additional lights or complex materials can make the results harder to interpret.
- Show children how to position the object between the flashlight and the screen.
- Keep the flashlight and screen steady while one child moves the object closer to and farther from the light.
- Pause at two or three positions so children can compare the shadow sizes.
- Invite children to take turns holding the light, moving the object, observing, or drawing.
- Ask children to predict what will happen before testing: “What do you think the shadow will do if the object moves closer to the flashlight?”
Give children time to explore before explaining the pattern. The First 8 Studios big-and-small shadow demonstration models a steady flashlight and changing object position, followed by children making predictions and comparing results.
Keep the screen, object, and light arrangement visible to the group, and make room for safe movement. The ChildCareEd Shadow Discovery Guide Buy Now $1.75 offers a focused sequence for ages 3–5, with a demonstration, activity choices, observation opportunities, and safety reminders.
What should children investigate besides distance?
After children have explored one variable at a time, let them test how position and orientation affect what they see. Turn the object sideways, rotate it, or move the flashlight to a different angle while keeping the other parts still. The shadow may shift across the screen or reveal a different outline. These changes help children notice that a shadow is related to both the shape of the object and the direction of the light.
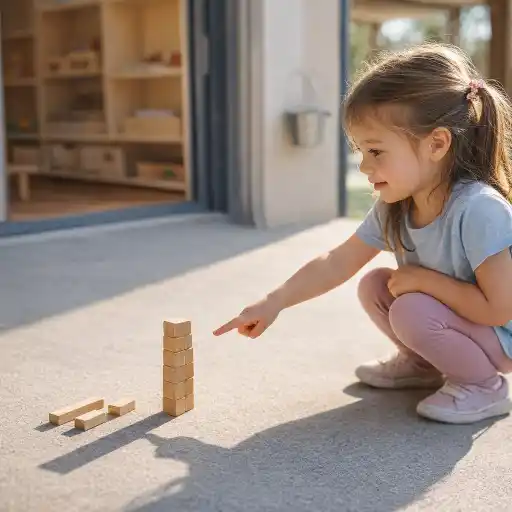
Try objects with different forms: a block, a spoon, a toy figure, or a cut-out shape. Ask children to match each object to its projected outline. An object’s surface details may not appear in the shadow, but its outline often provides useful clues. You can also compare materials: an opaque object blocks most light, while transparent and translucent materials let more light pass through and may produce fainter or less distinct effects.
- “What changed when we turned the object?”
- “Where is the flashlight in relation to the shadow?”
- “Which object made a shadow that was easiest to recognize?”
- “What could we move to make the shadow wider or narrower?”
Connect indoor discoveries to outdoor noticing. Children can look for shadows on a walk, observe which way they fall relative to the Sun, and return later to compare. The Sun’s apparent position changes over the day, so outdoor shadows can change direction and length; describe observations simply without requiring preschoolers to explain Earth’s motion.
These playful comparisons build #observation, spatial language, and confidence in asking questions. Let children share ideas through words, gestures, drawings, or actions, and value careful noticing even when their explanations are still emerging.
How can you guide inquiry without taking over?
Your role is to make children’s thinking visible and help them test an idea—not to provide every answer immediately. Listen for the question behind the play, then offer a prompt that helps children notice or make a choice. “What do you notice?” invites description; “What could we move to make it larger?” invites a test. Give children a quiet moment to respond, and treat unexpected results as reasons to investigate again.
When possible, change one variable at a time. Keep the flashlight and screen in place while the object moves, then return the object to its starting point before testing a different light position. A simple sequence helps children connect an action with an outcome: predict, test, observe, describe, and try again. This approach aligns with Science in Pre-K focused exploration guidance, which recommends building on children’s interests, supporting repeated attempts, and using photographs or drawings in science conversations.
- Record a child’s prediction or exact words on a sticky note.
- Take a photo of the setup or save a child’s drawing, following program privacy procedures.
- Revisit the record: “You thought it would get smaller. What happened when we moved it?”
- Offer more than one way to participate, including watching, pointing, describing, or drawing.
Documentation need not become a formal test. A brief note about what a child predicted, changed, or noticed can inform the next activity and help educators see developing #curiosity and reasoning. A relevant next step for professional learning is Facilitating Learning in the Preschool Classroom Buy Now $35.00, which addresses intentional planning and child-led learning experiences.
What common pitfalls and safety steps should providers consider?
A common challenge is moving the flashlight, object, and screen all at once. Children may see a larger or shifted shadow, but the cause is unclear. Reset the arrangement and repeat the test with just one change. If the shadow is faint, reduce competing room light when appropriate, adjust the flashlight angle, bring the screen closer, or choose a more opaque object.
Avoid turning the activity into a demonstration children only watch. Offer turns and let children make predictions, move materials, and describe results. At the same time, a flashlight investigation calls for active supervision and simple boundaries.
- Use battery-powered flashlights and keep them pointed toward the screen, never anyone’s eyes.
- Keep cords and hot lamps away from children; do not leave children unsupervised with equipment.
- Choose age-appropriate objects without loose small parts, and check materials before use.
- Keep walking space clear so children can take turns without crowding the light source.
- 🌟 If a child is unsure about the darkened area or projected images, keep the room brighter and offer a comfortable observing role.
Children may have different comfort levels and ways of participating. A child can point to a shadow, handle an object, draw the outline, or watch beside a trusted adult and still be part of the inquiry. Adapt the setup to the group and your program’s procedures; state requirements vary - check your state licensing agency.
For additional practical ideas, the ChildCareEd article Activities with Shadows describes playful options such as shadow tracing, puppet play, and documenting children’s observations.
Conclusion: How can a changing shadow become a science lesson?
Shadows change when the positions of the light source, object, or screen change. In a simple flashlight exploration, moving an object closer to the light usually makes its shadow larger, while moving it toward the screen and farther from the light generally makes it smaller. The most meaningful learning comes when children can see the effect, test a prediction, and describe what changed.
Keep the investigation practical: use a flashlight and familiar objects, hold all but one part of the setup steady, ask open-ended questions, and document a few children’s observations. Connect the indoor experiment to shadows outdoors, and offer flexible ways for every child to participate. When a preschooler asks why a shadow changed size, you have a ready opportunity to nurture #inquiry, language, and early scientific thinking—one small experiment at a time.
Further ChildCareEd learning:
- Basic Science in Early Childhood Buy Now $25.00 — strategies for planning meaningful science experiences and supporting reasoning.
- Facilitating Learning in the Preschool Classroom Buy Now $35.00 — intentional planning and child-led learning.
- Lesson Planning for Preschoolers
 Buy Now $24.00 — developmentally appropriate lesson planning.
- Building Early Science Foundations Buy Now $16.00 — play-based exploration and early scientific inquiry.
- Children at the Wheel: Emergent Curriculum Buy Now $25.00 — planning from children’s interests and questions.
- The ABCs of Behavior: Turning Challenges into Learning Opportunities
- Children at the Wheel: Emergent Curriculum
- Lesson Planning for Preschoolers
- Texas Director Credential
- Building Early Science Foundations
- Injury Prevention: Their Safety Is In Your Hands
- Montessori Cultural Activities: Exploring the World Through Play and Learning
- Enhancing STEM Education for Infants and Toddlers
- On My Plate: Children's Nutrition
- 🌙 ¿Cómo afecta el tiempo frente a las pantallas el sueño y el comportamiento infantil? 😴
- Lista para Guardería en Casa en Texas: Cómo Iniciar una Guardería en el Hogar
- Ejemplos de Crianza Respetuosa vs. Crianza Permisiva
- Cómo Ser Maestra de Preescolar en Dakota del Norte
- Calabazas, hojas y manzanas: actividades de otoño para preescolares
- Canciones, juegos y preguntas de círculo para niños
- Cómo simplificar la capacitación para sus empleados de daycare
- STEM for Preschoolers: Fun Activities That Encourage Curiosity
- How Can STEM Activities Turn Everyday Preschool Play Into Powerful Learning?
- ¿Qué habilidades preceden al recorte y cuándo deben aprender los niños a usar tijeras?
- How Can Teachers Use Children’s Questions to Create Meaningful Learning Experiences?
- How Can You Turn a Preschool Science Video into Hands-On Learning?
- Where Did Our Shadows Go on a Cloudy Day—and How Can We Revisit Yesterday’s Prediction?
- Can One Object Make Two Different Shadows at the Same Time?
- How Can Preschool Providers Explore Light and Shadows Without the Scare?
- How Can You Start a Classroom Weather Desk for Preschool Meteorologists?
- What Should Educators Do When Seasonal Pictures Do Not Match the Trees Outside?
- How Can Preschoolers Follow the Shadow as Fall Days Grow Shorter?
- Can Infants and Toddlers Think Like Scientists? What Early Exploration Really Looks Like
- Why Do Shadows Change Size? Turning a Preschool Question Into a Science Lesson
