A kite’s balanced shape can turn an abstract math idea into something children can see, touch, and create. Use a simple design project to help children notice matching halves, build spatial language, and explore early geometry; for a deeper foundation in playful math teaching, explore Early Mathematics Through Play Buy Now $24.00 and Math Foundations in Early Childhood  Buy Now $16.00. These courses offer practical strategies for weaving patterns, geometry, and reasoning into everyday classroom experiences.
Why is a kite a helpful way to introduce symmetry?
Symmetry can sound like a formal math term, but children can begin with a familiar question: “Do these two sides look alike?” A diamond-shaped kite offers a clear visual structure. An imaginary line running from its top point to its bottom point can divide the kite into two sides that resemble mirror images. Children can explore that relationship before they are expected to use precise mathematical definitions.
Designing a kite also connects geometry with art, movement, language, and problem-solving. Children make choices about shapes, colors, and placement, then compare the sides of their design. If a pattern appears on one side, they can decide what would make the other side look balanced. The goal is not a perfectly identical product; it is purposeful noticing, trying, and explaining.
Early math grows through meaningful encounters with shapes and space. NAEYC’s guidance on discovering shapes and space in preschool emphasizes giving children opportunities to identify, compare, create, and transform shapes. Kite design makes these ideas tangible: children can see how triangles combine into a larger diamond and how placement affects a design.
Keep the invitation playful and open-ended. A child who notices that a tail hangs from the middle, or that two colors meet at a center line, is already engaging in mathematical observation. Use the word #symmetry naturally, while welcoming children’s own descriptions such as “same on both sides” or “like a reflection.”
How can educators explain a line of symmetry in child-friendly language?
Start with concrete comparisons rather than a long definition. Show a kite image or a paper kite shape and trace an imaginary line from the top point to the bottom point. Explain that this is a “middle line” or “mirror line.” If we folded the paper along that line, would the two sides meet? This simple fold test helps children connect the idea of symmetry with an action they can observe.
Model the vocabulary alongside gestures. Point to one side, then the other; move your finger across the center line and ask whether the shapes, colors, or marks match. Explain that symmetrical designs have two matching halves when divided by a particular line. Some objects have more than one line of symmetry, while others do not have any; children do not need to master that distinction in their first exploration.
Try short, open questions that invite children to reason:
- “Where could our mirror line go?”
- “What do you notice on this side?”
- “What might we add on the other side to make it look balanced?”
- “Would the sides match if we folded the paper here?”
Accept approximate reasoning and multiple ways of communicating. Children may point, place a matching shape, draw a line, or explain with words. As the NAEYC article on shapes, space, and spatial visualization notes, using words such as flip, turn, and slide can help children describe how shapes relate and change. For this activity, “mirror,” “middle,” “matching,” and “across” are useful starting terms.
Connect the example to familiar objects: butterfly wings, a face, a leaf, or a folded card. These comparisons show that geometry is not limited to worksheets; it can be found in ordinary experiences and in children’s own designs.
How do you plan a hands-on kite symmetry activity?
Prepare a small-group invitation with kite-shaped paper, crayons or washable markers, paper shapes or stickers, and glue sticks. Draw or fold a vertical center line on each kite template. For young children, pre-cut the kite shapes and decorative pieces; children who are ready can help with cutting using child-safe tools and close supervision. The kite activity guide from ChildCareEd offers a related classroom resource for exploring shapes and patterns: Autumn Kite Activity Guide: Shapes, Symmetry, Patterns, and Counting Buy Now $1.85.
- Invite children to inspect the kite outline and identify its basic shapes, such as triangles and a diamond.
- Trace or point to the center line together. Describe it as the line that separates the two sides.
- Let each child decorate one side first. Encourage choices about colors, shapes, or simple patterns.
- Pause and ask children to look across the line. Invite them to add or arrange materials on the other side so the design appears balanced or mirrored.
- Have children compare, revise, and describe their choices. A paper fold can help make the matching idea visible.
Keep the emphasis on exploration rather than copying an adult’s finished example. Children may choose to make a near mirror image, create a repeating pattern, or intentionally make an asymmetrical design and talk about the difference. Process-oriented art experiences value children’s decisions and experimentation.
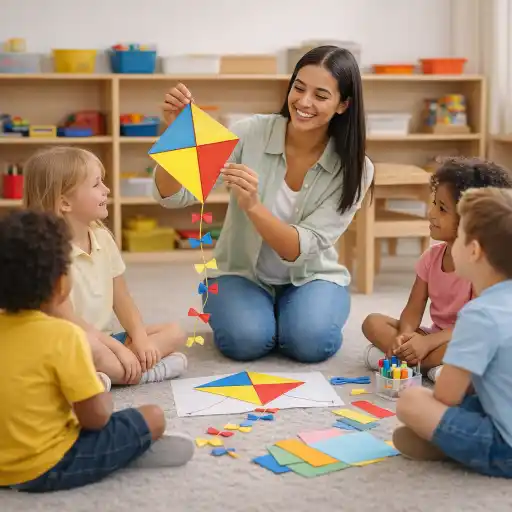 Use sturdy paper, supervise scissors and small decorative items, and adapt materials to children’s abilities. The finished kite can be displayed indoors; an outdoor flight is optional and should be planned separately with weather, site hazards, and active supervision in mind.
Which teaching moves deepen the learning without taking over?
Children benefit when educators make mathematical thinking visible while leaving room for independent choices. Rather than correcting every difference, narrate what you notice: “You put a blue triangle on the left. What could you try on the right?” Then pause. Wait time gives children space to inspect, make a decision, and explain their reasoning.
Offer scaffolds in small steps. A child who is unsure where to begin might use a pre-drawn center line, two matching sets of large shapes, or a half-completed kite design. Another child may be ready to make a pattern and reflect it across the line.
Support language and access by:
- Pairing words with gestures, visual examples, and real objects.
- Offering stickers, chunky crayons, stamps, or tactile shapes for varied motor and sensory needs.
- Inviting children to respond by pointing, arranging pieces, speaking, drawing, or using their home language.
- Working in pairs so children can take turns as designer and “mirror” matcher.
Use observations to decide what to offer next, not to rank children’s artwork. Record a brief note such as “compared both sides,” “used the center line,” or “asked for a matching shape.” These observations can guide your next invitation: perhaps a butterfly fold, a mirror station, or a symmetrical block design. The purpose is to extend curiosity and confidence, not to demand adult-level precision from preschoolers.
When you notice a child’s strategy, name it specifically: “You checked the distance from the line before placing the second circle.” This kind of feedback affirms effort and helps children recognize the thinking behind their creative work.
What common pitfalls should providers avoid?
A common mistake is defining symmetry only as “both sides are exactly the same” and then expecting every young child to reproduce a precise reflection. Early learners may be ready to notice matching features well before they can plan a fully mirrored design. Treat the kite as an invitation to explore, and respond to what children are beginning to understand.
Another pitfall is turning the activity into a template-following craft. If every child receives the same colors in the same positions, there may be little room for reasoning or personal expression. Offer a manageable selection of materials and let children decide what to place, where to put it, and whether they want their design to match across the line.
Avoid using questions that have only one “right” answer when children are still investigating. Instead of “Is it symmetrical?” ask, “What do you notice?” or “How could you check?” Folding a paper shape, placing a small mirror beside a design, or matching loose parts across a marked line can help children test their ideas. The play-based suggestions in symmetry activities for preschoolers offer additional ways to explore through art, objects, and outdoor observation.
Finally, keep the activity safe and accessible. Avoid tiny loose parts with children who may mouth objects, supervise cutting closely, and make sure adhesives and art materials are appropriate for the age group. If you take kite designs outdoors, assess the location and conditions first; keep children away from power lines, roads, and severe weather, and maintain active supervision. State requirements vary - check your state licensing agency.
How can educators extend and document children’s discoveries?
Build on children’s interest by revisiting the kite design in different ways. Offer a mirror at the art table, invite children to fold paper shapes, or create a large center line on the floor with tape and let children place matching blocks or foam shapes on either side. A nature walk can add further examples: leaves, flowers, and some animal forms can prompt children to look for approximate bilateral symmetry. These experiences echo the practical, play-based approach described in hands-on symmetry activities for preschool and kindergarten.
Connect the project to other learning areas without overloading it. Children can count the shapes on each side, compare colors, make an AB pattern, describe position, or dictate a sentence about their design. Invite them to draw a kite plan before building or to revise one feature after comparing both halves. This makes mathematical reasoning part of art, language, fine-motor work, and collaborative problem-solving.
Documentation can be brief and useful. Take a photo of the process, save a child’s drawing, or write down a quote that captures their thinking. Consider prompts such as:
- “How did you decide what to add on the other side?”
- “What helped you check whether the sides looked alike?”
- “What would you change if you made another kite?”
Look for evidence of noticing, comparing, using spatial words, persisting, and revising—not just a finished product with identical halves. Share a photo or child quote with families to make the learning visible and invite them to notice symmetry at home. Repeated, low-pressure opportunities help children build a richer understanding over time.
Conclusion: How can a kite help children discover symmetry?
A kite design offers a simple, engaging route into symmetry because children can see a center line, compare two sides, and experiment with shapes and patterns. Start with concrete language and a fold test, provide open-ended materials, and use prompts that encourage children to notice and explain. Make room for approximate matches, individual expression, and different ways of participating.
Most importantly, assess the thinking rather than the neatness of the finished kite. When providers observe, describe, and extend children’s ideas, a small art project can become a meaningful early geometry experience. With practice, children begin to recognize that balance and mirror-like patterns appear in designs, nature, and everyday surroundings.
Five ChildCareEd courses to explore:
- CDA Subject Area 2
- CDA Home Visitor Subject Area 3 Part 3 Birth to 5
- CDA Home Visitor Subject Area 2 Part 3 Birth to 5
- Using AI Language Models for Trainers
- Math Foundations in Early Childhood
- Texas Director Credential
- Wellness in Action: Teaching Healthy Habits to Children
- Enhancing STEM Education for Infants and Toddlers
- Environments That Inspire Independence and Exploration
- CDA Certification en Español: Recursos y Consejos para Educadores Bilingües
- 💛🧩 ¿Cómo puedo hacer que mi enseñanza sea inclusiva para los niños con autismo?
- ¿Cuáles son las mejores actividades de primeros auxilios para adultos?
- 10 Ejemplos de Cómo la Cultura Influye en el Desarrollo Infantil
- Capacitación en Salud y Seguridad Preventiva en Línea para Proveedores de Cuidado Infantil
- Requisitos de Cuidado Infantil en Nueva Jersey para Centros y Proveedores de Cuidado Infantil Familiar
- Proporciones de Cuidado Infantil y Tamaños de Grupo por Edad en Maryland (Guía Rápida para Centros y Hogares)
- Proporciones de Cuidado Infantil y Tamaños de Grupo por Edad en Nueva Jersey (Guía Rápida para Centros y Hogares)
- Proporciones de Cuidado Infantil y Tamaños de Grupo por Edad en Virginia (Guía Rápida para Centros y Hogares)
- Lista para Guardería en Casa en California: Cómo Iniciar una Guardería en el Hogar
- Cómo Trabajar en el Cuidado Infantil en Carolina del Norte: Requisitos y Pasos
- Celebrando la amistad en el cuidado infantil durante el Día de los Mejores Amigos
- Canciones, juegos y preguntas de círculo para niños
- Cómo simplificar la capacitación para sus empleados de daycare
- Cómo Planificar Actividades al Aire Libre Seguras Durante el Calor y la Mala Calidad del Aire
- Reglas y regulaciones de guarderías en Minnesota 2026: Requisitos actuales y próximos cambios
- Can You See the Wind? 8 Outdoor Spring Activities That Help Children Explore It
- Why Did My Stamp Print Backward? Discover Reversal Through Printmaking
- How Can a Kite Design Help Children Discover Symmetry?
- How Can Preschool Flag Activities Introduce Symbols and Community Belonging?
