A broken toy, wobbly cardboard bridge, or loose wheel can become a compelling invitation to ask, “How does this work—and what could we try?” A classroom repair clinic turns everyday objects into hands-on opportunities for children to observe, predict, test, and explain. To build your foundation in developmentally appropriate inquiry, explore ChildCareEd’s Building Early Science Foundations  Buy Now $16.00; it offers practical guidance for nurturing young children’s curiosity and scientific exploration.
Why make repair and investigation part of the classroom?
A repair clinic is not a miniature workshop where children are expected to restore everything to its original condition. It is a carefully supervised learning area where children examine how objects are made, how their parts relate, and what changes when a material is bent, joined, rolled, or supported. The focus is the process of inquiry—not a perfect repair.
When children investigate familiar materials, they practice noticing details, asking questions, making predictions, and revising ideas. A piece of cardboard that bends under a block may lead to a conversation about strength; a wheel that will not turn may prompt children to inspect its connection to an axle. These experiences also support vocabulary, collaboration, fine-motor coordination, and early mathematical thinking as children compare size, shape, weight, and movement. As Karen Worth explains in Science in Early Childhood Classrooms: Content and Process, children’s curiosity and direct engagement with materials can be a foundation for inquiry and broader learning.
A repair clinic can also make children feel capable and valued. Their ideas are treated as meaningful evidence, even when a proposed fix does not work. In this setting, #curiosity, persistence, and shared problem-solving are visible parts of everyday classroom life.
How can you set up a safe, inviting repair clinic?
Start with a small, clearly defined area: a sturdy table, a tray or washable work surface, and a few objects selected for investigation. The clinic can be temporary or portable; it does not require a permanent makerspace. Signs and investigation cards can help children understand the purpose of the area and give staff a consistent way to invite exploration.
Choose objects that are clean, intact enough to handle safely, and suitable for the children’s ages and abilities. Good starting points include large cardboard shapes, fabric pieces, sturdy containers, large plastic gears, and toys with simple, visible connections. Avoid items with sharp edges, hazardous substances, batteries, electrical components, or small parts that may present choking risks. Do not offer objects that are recalled, damaged in a hazardous way, or designed to be used only by adults.
- Provide a few child-safe tools, such as blunt craft sticks, large connectors, or age-appropriate screwdrivers used with close adult supervision.
- Use picture labels and simple signs, such as “Look closely,” “What do you notice?” and “Ask an adult before using a tool.”
- Prepare a separate “needs adult attention” container for items that are unsafe or cannot be investigated by children.
- 🧰 Keep the work area organized, with clear expectations for sharing, returning materials, and washing hands when needed.
Inspect materials before and after use, supervise actively, and follow program procedures. Federal child care health and safety guidance emphasizes that equipment and materials should be in good repair, appropriate to children’s development, and free of hazards; see the Safety of Equipment, Materials, and Furnishings resource. State requirements vary - check your state licensing agency.
What investigations can children conduct with everyday materials?
Offer an open question rather than a demonstration with a predetermined answer. Investigation cards can pose prompts such as “What helps this structure stand?” or “How can we make this wheel move?” Children might inspect a simple object, draw what they think is inside, or compare two materials before trying a safe change. Keep materials limited at first, then add choices in response to children’s ideas.
For example, provide cardboard strips, large blocks, and fabric. Invite children to build a small platform that can hold a large toy. They can test it, notice where it bends, and change one feature—perhaps adding a support or folding an edge—before trying again. Or offer a large toy vehicle with a loose but safe-to-handle wheel assembly and ask children to observe what moves and what stays still. Adult staff should inspect and manage any object with parts that could detach.
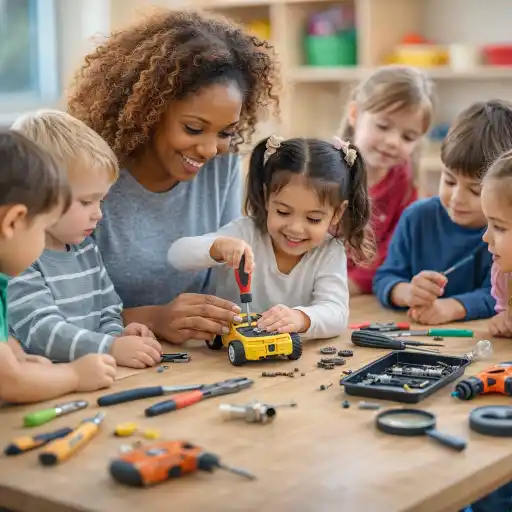
These experiences connect naturally to engineering. In a preschool design process, children can identify a need, imagine and plan, make a model, test it, and improve it. The sequence described in NAEYC’s Growing in STEM: The Design Process supports cycles of design and revision rather than one-and-done tasks.
- Compare materials: Which bends, stretches, rolls, or stands upright?
- Explore connections: What happens when pieces are stacked, folded, or joined?
- Test a design: Can children make a bridge, ramp, or container more stable?
- Represent thinking with sketches, photos, models, or dictated explanations.
Use clean, safe everyday objects where appropriate. ChildCareEd’s guide to meaningful STEM exploration with everyday materials offers additional ideas for low-cost investigations.
How can educators guide without taking over?
Begin by observing. Watch what children inspect, repeat, avoid, or discuss before stepping in with a suggestion. A brief question and a thoughtful pause often do more to extend learning than a detailed explanation. Try “What do you notice about this part?”, “What do you think might happen if we add a support?” or “How could we find out?”
Help children connect their ideas to evidence. If a tower falls, describe what happened without labeling the attempt a failure: “The top moved when we added the block.” Invite them to compare the original and revised designs. When appropriate, introduce precise words such as flexible, sturdy, connect, axle, balance, and stable, linking each term to something children can see or handle.
Children may communicate through speech, gesture, home languages, drawing, or building. Treat these as meaningful contributions. Offer roles that allow different forms of participation: one child can observe, another can draw, and another can help select materials. Adults can manage tools or tricky steps while keeping children involved in decisions and reasoning.
NAEYC’s article Small Hands, Big Ideas: Exploring STEM Through Tinkering, Making, and Engineering emphasizes that the learning process matters more than the finished product. The educator’s role is to create a rich environment, ask questions, and support children as they plan, test, collaborate, and improve. Keep your prompts open-ended, affirm effort and reasoning, and allow enough time for children to return to an idea.
How can you document learning and prevent common pitfalls?
Documentation can be quick and useful: take a photograph of a test, write down a child’s exact words, or ask the child to draw a design before and after a change. Revisit these records with children: “What did we try first? What changed?” A small record makes thinking visible, supports planning, and helps families understand the learning behind the activity.
Common pitfalls are manageable with a few routines. Avoid turning the clinic into an adult-led repair demonstration, offering too many materials at once, or treating the original condition of an object as the only successful outcome. Also avoid using broken equipment that poses a safety hazard; the clinic is for safe investigation, not for children to handle items awaiting maintenance or disposal.
- Set one manageable question and offer a small set of appropriate materials.
- Model how to ask for help and handle tools safely before children begin.
- Capture one useful observation, quote, or image rather than trying to record everything.
- Invite children to decide whether to continue, change the design, or explore a new question.
Programs should maintain an ongoing process for inspecting and removing unsafe materials. The Virtual Lab School guidance on ensuring toys and materials are safe encourages staff training, regular observation, and clear procedures for reporting problems. Directors can support consistency by agreeing on which materials belong in the clinic, how staff assess hazards, and where items needing repair are stored securely away from children.
Conclusion: How can a repair clinic make investigation part of daily learning?
A classroom repair clinic can transform children’s questions about objects into meaningful practice in science and engineering. Set up a safe, organized space; select a few suitable materials; invite children to notice, predict, test, and revise; and document their thinking in simple ways. The aim is not to make every object work again, but to help children discover how materials behave and how ideas can be improved.
With supportive questions and careful supervision, a wobbly structure or a loose connection can become the beginning of a shared investigation. Start with one prompt and one small group, then build on what children wonder about. To deepen your understanding of early inquiry and developmentally appropriate science experiences, explore Building Early Science Foundations Buy Now $16.00.
Additional English-language ChildCareEd courses:
- Moving About the Classroom: Effective Transitions for Everyday
- CDA Home Visitor Subject Area 3 Part 3 Birth to 5
- CDA Home Visitor Subject Area 2 Part 3 Birth to 5
- The ABCs of Behavior: Turning Challenges into Learning Opportunities
- Birth to Five CDA Credential with Portfolio Review
- CDA Bridge Bundle: Preschool
- CDA Bridge Bundle: Family Child Care
- CDA Bridge Bundle: Infant/Toddler
- Texas Director Credential
- CDA Certification en Español: Recursos y Consejos para Educadores Bilingües
- 💛🧩 ¿Cómo puedo hacer que mi enseñanza sea inclusiva para los niños con autismo?
- Recursos en Español sobre el Sueño Seguro del Bebé
- 10 Ejemplos de Cómo la Cultura Influye en el Desarrollo Infantil
- Proporciones de Cuidado Infantil y Tamaños de Grupo por Edad en Maryland (Guía Rápida para Centros y Hogares)
- Proporciones de Cuidado Infantil y Tamaños de Grupo por Edad en Nueva Jersey (Guía Rápida para Centros y Hogares)
- Proporciones de Cuidado Infantil y Tamaños de Grupo por Edad en Virginia (Guía Rápida para Centros y Hogares)
- Lista para Guardería en Casa en Illinois: Cómo Iniciar una Guardería en el Hogar
- Retraso del Habla en la Guardería: Cómo Pueden Ayudar los Proveedores
- Cómo Trabajar en el Cuidado Infantil en Carolina del Norte: Requisitos y Pasos
- Cómo Ser Maestra de Preescolar en Wisconsin
- Cómo Ser Maestra de Preescolar en Maryland
- Capacitación Previa al Servicio para Proveedores de Cuidado Infantil en Wisconsin
- Celebrando la amistad en el cuidado infantil durante el Día de los Mejores Amigos
- Canciones, juegos y preguntas de círculo para niños
- Cómo simplificar la capacitación para sus empleados de daycare
- Labor Day Makers: Creative Projects That Get Pre-K Kids Thinking and Building
- How Can Providers Rotate Classroom Materials Without Overwhelming Children?
- How Can Child Care Providers Help Children Understand How Community Helpers Contribute?
- How Can a Classroom Repair Clinic Help Children Investigate How Materials Work?
