Create a sparkling, developmentally rich #classroom experience with DIY glitter slime. This indoor activity combines creativity, #sensory #play, and early #science—ideal for supporting fine-motor practice, exploratory language, and hypothesis-testing. Use this guide with appropriate supervision and preparation, and consider pairing the activity with professional learning such as Building Early Science Foundations  Buy Now $16.00 and The Best Promotion Is Play Buy Now $35.00 to align the project with curriculum goals and assessment. The recipe below uses simple materials (glue, baking soda, and a contact-solution activator) plus glitter for sparkle; the sections that follow explain safety, adaptations for different ages, classroom-management tips, and assessment ideas so teachers can lead the experience confidently. #classroom #sensory #play #science #development
How do I make glitter slime safely in the classroom?
Ingredients (per small-group batch):
- 6 oz glitter glue
- 1/2 tsp (approximately 1/3 Tbsp) baking soda
- 1 to 1 1/2 Tbsp contact lens solution (must contain boric acid)
- Rubber spatula or mixing spoon
- Optional: extra craft glitter
Directions:
- Pour the glue into a mixing bowl and stir in the baking soda until combined.
- Add glitter (if using) and stir until evenly distributed.
- Add 1 Tbsp contact lens solution and mix; if the mixture remains sticky, add more in small increments (up to about 1 1/2 Tbsp) until it starts to pull away from the bowl.
- When the mixture firms, remove and knead with clean hands until it becomes stretchy and cohesive.
These proportions and steps follow classroom-tested recipes; the contact-solution activator must contain boric acid to work reliably (Super Easy Snowman Slime Recipe, Sparkly Silver Slime Recipe). Always mix in a well-ventilated area and supervise each step closely.
What safety and supervision steps are required when doing slime with children?
Safety and supervision are essential. Follow these classroom practices:
- Age and mouth-safety: Reserve this activity for preschoolers who do not mouth materials or for older groups; do not use with infants or mobile toddlers who place items in their mouths.
- Ingredient screening: Check children for skin sensitivities and allergies (especially to borates); obtain parental permission when appropriate.
- Contact-solution caution: Only use contact lens solution that lists boric acid on the label as an ingredient; do not substitute unknown or homemade solutions.
- Supervision and PPE: Maintain active supervision during mixing and kneading. Consider gloves for staff if there are known sensitivities and require handwashing after handling slime.
- Storage: Store finished slime in labeled, sealed containers away from food areas. Replace frequently and discard if contaminated.
- Cleanup: Have wet-wipes and warm soapy water for immediate cleanup. Protect tables with washable coverings and test surfaces for staining before the activity.
For strategies to supervise and structure messy, hands-on experiences, consider training such as Safe Supervision in Child Care: Birth to School Age Buy Now $24.00 and Engaging Indoor Activities for Inclement Weather Buy Now $24.00.
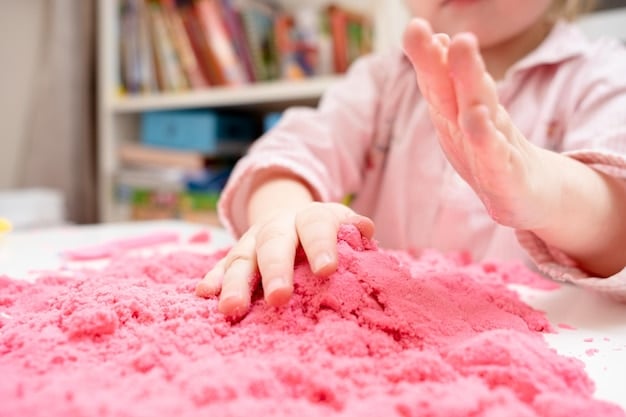
How does making slime support learning and development?
Slime is not just play; it can target measurable skills:
- Fine-motor: mixing, pinching, and kneading strengthen small muscles and bilateral hand use.
- Language and science: Encourage descriptive vocabulary (stretchy, cohesive, sticky) and simple hypothesis testing (What happens if we add more solution?).
- Self-regulation and sensory processing: Manipulating slime can help children modulate sensory input; pair with strategies from behavior and sensory courses when needed.
Link relevant classroom practice articles: 10 Fine Motor Activities, Everyday Montessori.
How can I adapt the slime activity for different ages or constraints?
Options when glitter slime is inappropriate or you want variety:
- Smaller sensory portions: Offer individual portions in shallow containers for children who prefer minimal contact.
- Edible or fully non-toxic alternatives: Use safe, edible recipes when working with very young children or when families request non-chemical options.
- Sensory stations: Turn the experience into a sensory exploration table with sealed sensory bottles for children who cannot manipulate slime directly (see How to Make Your Own Sensory Bottles).
- Low-mess glitter crafts: If glitter is a concern, try the craft alternatives in Easy Glitter Crafts for Toddlers or Toddler Glitter Crafts.
How should I manage the classroom while doing messy group activities?
Practical classroom-management tips:
- Prep stations: Pre-measure ingredients into cups so mixing is efficient and predictable.
- Group roles: Assign helper roles (measurer, mixer, recorder) to foster participation and classroom routines.
- Routines for transitions: Plan a handwashing and clean-up routine as part of the activity, and document observations for assessment.
- Assessment and extension: Use the opportunity for documentation—vocabulary growth, fine-motor progress, and science talk—which pairs well with curriculum goals.
Related ChildCareEd articles for extensions and seasonal adaptations: Indoor and Outdoor Activities, Snow Much Fun: Winter Sensory Activities, and Pumpkin Spice and Sensory Delight.
How should I inform families and get permission for a slime activity?
Tell families in advance and provide an ingredient list (glue, baking soda, contact-lens solution containing boric acid, and optional glitter). Request written permission when your program policy or local regulation requires it and always note known allergies or skin sensitivities in the child's record. Offer an alternate, non-chemical activity for children whose families decline. Sample language for a notice: 'We will use glue, baking soda and a small amount of contact-lens solution (contains borate) to make sensory slime. Please tell us if your child has any skin allergies or if you prefer an alternative activity.' Provide translations as needed and document any accommodations. Keep a dated copy of the permission/notification in the child's file and follow up if a child shows a skin reaction.
How can I document and assess children's learning during and after the slime activity?
Use focused observation to capture targeted outcomes: fine-motor coordination (pinch, stretch, knead), use of descriptive vocabulary, and engagement in simple inquiry (hypothesis-testing). Practical steps: 1) Set 1–2 learning goals per small group (for example, 'child will use two new descriptive words'); 2) Use brief anecdotal notes or a checklist during the activity to record who met the goal and under what conditions; 3) Take photos or short video clips with parental permission to document process skills; 4) Collect a child quote or recorded utterance that shows vocabulary growth or causal thinking. Add observations to the child's developmental record and share a short note with families that highlights the skill observed and a suggested activity to continue practice at home.
Summary: Key steps and resources
Glitter slime can be a high-value, hands-on learning experience when planned and supervised carefully. Key actions: use verified activator-containing contact solution, pre-measure materials, supervise closely, document children's learning, and offer adaptations for age and sensory needs. Professional learning and training referenced above (Building Early Science Foundations; The Best Promotion Is Play; Safe Supervision in Child Care) will help teachers integrate the activity into curriculum and assessment. For craft and sensory alternatives, see the linked ChildCareEd articles included in this article.
- CDA Preschool Credential
- CDA Family Child Care Credential
- CDA Infant/Toddler Credential
- Birth to Five CDA Credential with Portfolio Review
- CDA Family Child Care Credential with Portfolio Review
- 24 Hour Texas Pre-Service
- Early Childhood Education
- Texas Director Credential
- Montessori Cultural Activities: Exploring the World Through Play and Learning
- Supporting Families and Caregivers in Language and Literacy
- 10 Fine Motor Activities to Keep Tiny Hands Warm this Winter
- DIY Snow Globes: The Fine Motor Craft That’ll Keep Kids (and Adults) Busy for Hours
- Big Snowflakes, Bigger Milestones: Supporting Child Development Through Seasonal Activities
- 💛🧩 ¿Cómo puedo hacer que mi enseñanza sea inclusiva para los niños con autismo?
- 🤔 ¿Cómo hablo con los padres cuando un niño no está avanzando en el entrenamiento para ir al baño?
- 😫🧸 ¿Qué hacer cuando un bebé no quiere dormir la siesta en el aula?
- Celebra El Cumpleaños de Dr. Seuss En Tu Guardería Con Actividades Fáciles y Divertidas!
- Recursos en Español sobre el Sueño Seguro del Bebé
- ¿Cuáles son las mejores actividades del Día de la Tierra para niños en casa o en el aula?
- ¿Cómo puedo usar escenarios de juego de roles de primeros auxilios en mi aula?
- Actividades de Motricidad Gruesa que Desarrollan el Equilibrio, la Coordinación y la Fuerza
- 10 Ejemplos de Cómo la Cultura Influye en el Desarrollo Infantil
- Proporciones de Cuidado Infantil y Tamaños de Grupo por Edad en Maryland (Guía Rápida para Centros y Hogares)
- Proporciones de Cuidado Infantil y Tamaños de Grupo por Edad en Wisconsin (Guía Rápida para Centros y Hogares)
- Proporciones de Cuidado Infantil y Tamaños de Grupo por Edad en Nueva Jersey (Guía Rápida para Centros y Hogares)
- Proporciones de Cuidado Infantil y Tamaños de Grupo por Edad en Virginia (Guía Rápida para Centros y Hogares)
- Actividades de Otoño Fáciles para Preescolares esta Temporada
- Retraso del Habla en la Guardería: Cómo Pueden Ayudar los Proveedores
- Easy Glitter Crafts for Toddlers and Preschoolers
- Toddler Glitter Crafts: Fun, Safe, and Easy Ideas
