Blast Off: Build a NASA Water Rocket
It's summertime, and a well-run program can turn warm afternoons into productive STEM learning. This practical guide shows child care professionals how to run a supervised, curriculum-connected water-rocket activity that teaches engineering design, measurement, prediction, and cooperative problem-solving. For providers preparing materials and lesson plans, consider pairing this activity with one of our courses: Designing Your School-Age Classroom Buy Now $35.00 and 45-Hour School Age Curriculum  Buy Now
 $399.00$275.00 to strengthen your lesson planning and environmental design. The instructions below adapt NASA's water-rocket concept for a classroom or outdoor program while emphasizing safety and learning objectives.
What is a water rocket and what learning goals does it support?
Water rockets use pressurized air and water inside a plastic bottle to produce thrust. As a STEM activity for school-age children (approx. 6–12 years old), the learning goals include: applying the engineering design process, making testable predictions and measurements, using basic physics vocabulary (force, pressure, mass, trajectory), and practicing cooperative planning and reflection. These outcomes align with developmentally appropriate school-age goals and can be scaffolded for mixed-age groups. For younger children, adapt expectations and emphasize observation rather than technical measurement; see our related resources on integrating STEM across ages: 10 STEM Ideas for Preschoolers and STEAM Learning in Early Childhood.
How do you build a safe NASA-style water rocket step by step?
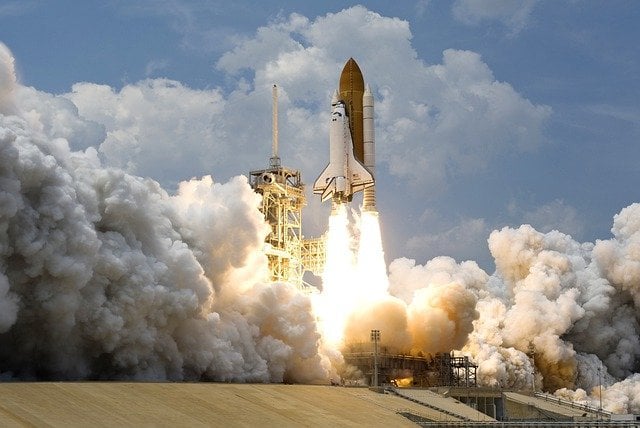
Materials (per rocket): a 1- or 2-liter PET soda bottle, cork or rubber bung to fit the bottle mouth, a valve (bike pump presta/schrader adapter or garden hose adapter), duct tape, cardboard or foam for fins, safety cone or launch pad (PVC or sturdy base), water, bicycle pump with pressure gauge or manual air pump with gauge, safety glasses for participants.
- Prepare the rocket body: Attach three evenly spaced fins around the bottle's lower third using duct tape and lightweight cardboard—ensure symmetry to stabilize flight.
- Build a launch adapter: Fit the valve securely into the cork or bung so the pump can pressurize the bottle. Test the seal with a small hand pump before adding water.
- Fill and position: Fill the bottle to approximately one-third water by volume (this is the empirical starting point—teams will test different volumes to optimize distance). Place the bottle inverted on the launch pad with the nozzle facing downward if using a simple pad, or upright depending on adapter design—always anchor the launch base to the ground.
- Establish clear safety zones: Mark a minimum 10–15 foot exclusion radius for children and observers, assign roles (pump operator, range safety, data recorder), and require safety goggles for everyone within 20 feet.
- Pressurize and launch: The operator slowly pumps air while the safety monitor verifies pressure; release the bottle remotely if possible (quick-release pin or long cord). Record launch pressure, water volume, and flight observation.
- Debrief and iterate: Discuss outcomes, compare predictions with results, and repeat with controlled variable changes (e.g., water volume, fin shape) for experimental learning.
Reference materials: NASA's water rocket construction guide is a reliable technical reference: Building a NASA Water Rocket (pdf). Keep this link available for detailed construction schematics.
How can you turn a single launch into a structured STEM lesson plan?
To move from play to intentional learning, structure the activity across three learning phases: (1) Design & Hypothesis—students sketch rocket variations and predict outcomes using prior observations; (2) Test & Measure—conduct controlled launches, collecting quantitative data (pressure, distance, time aloft) and qualitative notes (flight stability, angle); (3) Analyze & Reflect—graph results, identify patterns, and propose design revisions. Provide age-appropriate data sheets and use measurement tools (tape measure, stopwatch, simple pressure gauge) so children practice numeracy and data literacy in an applied context.
Pair this hands-on module with classroom management and curriculum courses to ensure consistent learning objectives and behavioral expectations: Guiding School-Aged Children Buy Now $32.00 and Teacher/Child Interactions in the School-Age Classroom Buy Now $24.00 provide strategies for positive guidance and effective interactions during active, outdoor STEM lessons.
What safety, supervision, and inclusion considerations must providers plan for?
Water and pressurized air introduce clear risk vectors. Providers must perform a written risk assessment addressing projectile hazards, slips on wet surfaces, and hearing/eye protection. Assign adults to active supervision roles familiar with the launch sequence and emergency stop procedures. For mixed-ability groups, offer alternative roles (data recorder, stopwatch operator, hypothesis presenter) so children with motor or sensory differences can participate meaningfully. Train staff in active supervision and site-specific safety protocols; relevant professional development includes Effective Supervision in Child Care Buy Now $25.00 and Building and Physical Premises Safety Buy Now $10.00.
How can you extend learning and assess outcomes after the activity?
Extensions promote higher-order thinking: have learners design a multi-launch experiment to optimize a single outcome (max distance or maximum airtime), integrate writing by composing launch reports, or connect to curriculum standards through vocabulary lists and cause-effect concept maps. Use rubrics to evaluate planning, evidence use, and collaborative behaviors. Consider family engagement by sending a summary home with photos and simple at-home experiments to encourage continued exploration.
How should programs measure and record rocket performance for meaningful learning?
Reliable measurement turns launches into evidence-based learning. Establish a consistent protocol: choose a fixed launch line and azimuth, measure distance with a tape or measuring wheel along that same line, time each flight with a stopwatch, and record launch pressure and water volume for every trial. Provide a simple data sheet with columns for trial number, independent variable, pressure (psi or kPa), water volume (ml or %), launch angle, distance, and brief stability notes. Teach children to take repeated measures, compute averages, and plot results so they can identify trends and propose informed design revisions. Share aggregated class data during reflection to emphasize collaborative analysis and evidence-based iteration.
Summary: What should providers remember before they launch?
Water rockets are an engaging way to teach scientific inquiry, engineering design, measurement, and cooperative practice in school-age programs. To run a successful lesson, prepare materials and risk controls, scaffold the experience through design–test–revise cycles, and document learning with data sheets and reflective prompts. Link the activity to your curriculum through deliberate planning and consider staff development courses to refine supervision and lesson design. Keep NASA's construction guide as a technical reference and adapt for your local site conditions.
Related articles: School-Age Program Ideas, Hands-On Activities for School-Age Child Care, Seasonal Activities with Educational Goals, Exploring Sand, Space, and Science, Turn Summer Days into Learning Moments, Bridge the Summer Gap
*Archived from ChildCareED's Constant Contact Newsletters [6.24.2022]
- Magicians in the Classroom: How Preschool Teachers Turn Chaos into Learning
- Big Snowflakes, Bigger Milestones: Supporting Child Development Through Seasonal Activities
- 👶 ¿Cuáles son las proporciones y grupos requeridos en Dakota del Norte? 🏫
- Why Open-Ended Play Is Essential for Healthy Child Development
- Celebra El Cumpleaños de Dr. Seuss En Tu Guardería Con Actividades Fáciles y Divertidas!
- How can I build early literacy skills through everyday activities?
- Turn Your Classroom Into a Reading Wonderland for National Book Month
- How can centers use a 30-60-90 day plan to onboard new teachers?
- Curso de Comunicación de 9 Horas de Maryland
- Apoyo en Español para Capacitaciones Grupales Presenciales y por Zoom en Cursos Selectos
- 10 STEM Ideas for Preschoolers to Explore and Learn
- How Can Michigan Providers Prevent Summer Learning Loss in Young Children?
- What Hands-On Activities Work Best for School-Age Child Care?
- How can I plan meaningful STEM projects for school-age children?
- School-Age Program Ideas: Games, Projects, and Group Activities
- School-Age Lesson Plan Ideas: STEM, Art, Movement, Reading, and More
- How Can Loose Parts Play Turn Everyday Objects Into Powerful Learning Opportunities?
